
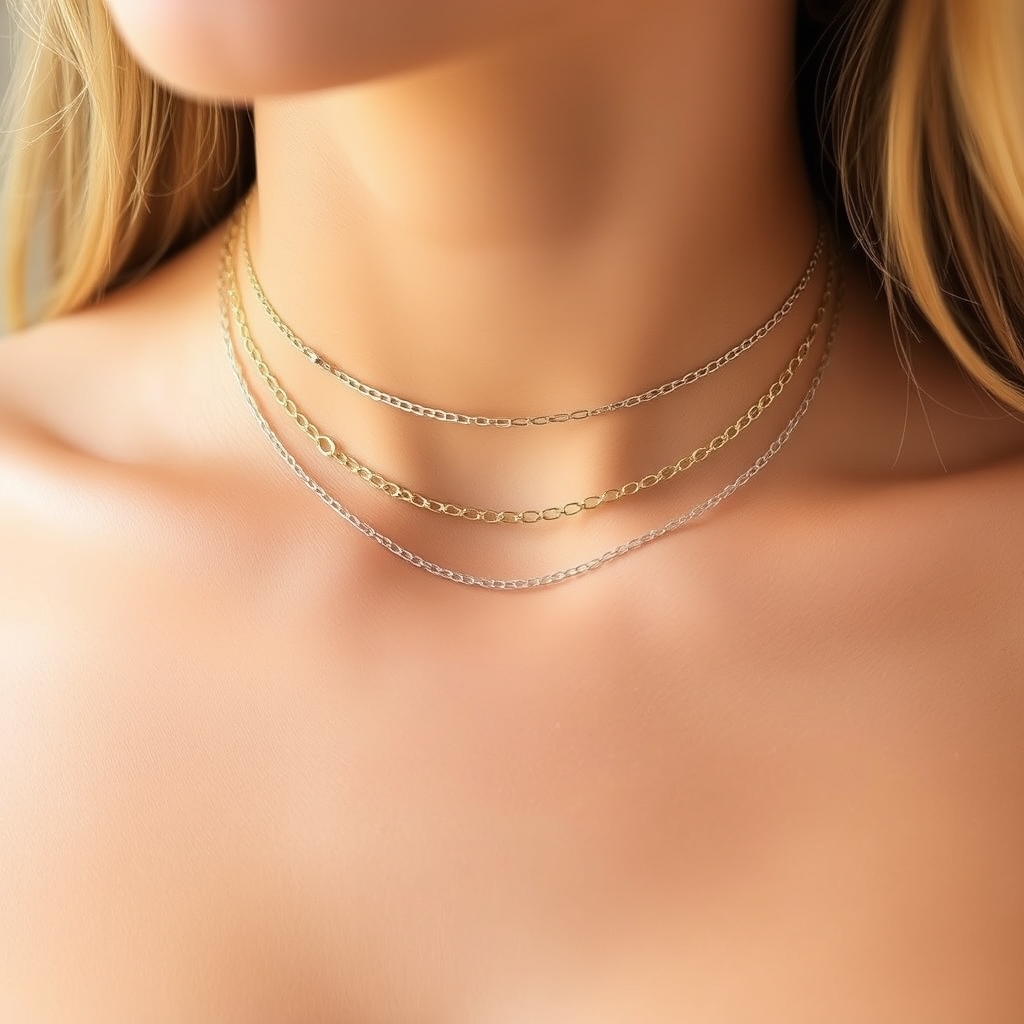
Layering delicate necklaces means wearing two or more thin chains at different lengths so each one sits distinctly on your neck without overlapping or tangling together. The key is spacing: each necklace should hang at a visibly different point on your torso so the eye sees them as separate pieces, not a knotted mess. Done right, a layered look is effortless and elegant. Done wrong, it reads as sloppy or overwhelming. This guide shows you the exact spacing, material pairings, and clasp-securing techniques that separate polished from chaotic.
What You’ll Need
- Three to five delicate necklaces in varying lengths (see the length chart below)
- Magnetic or adhesive necklace anchors (optional but highly recommended) to prevent shifting
- A necklace organizer or hanging storage to keep layers untangled when not worn
- A soft cloth (microfiber preferred) to inspect chains for preexisting damage
- Clear nail polish or jewelry adhesive (optional, for loose clasps only)
You don’t need expensive pieces the principle works with costume and fine jewelry alike. What matters is chain thickness and clasp stability, not price.
The Golden Rule: The Three-Layer Length Chart
The most common mistake is buying necklaces at random lengths and hoping they work. Instead, follow this spacing framework based on typical wearer observations:
| Layer Position | Recommended Length | Where It Sits | Visual Effect |
|---|---|---|---|
| Closest (Shortest) | 14–16 in (35–40 cm) | High on the collarbone or close to the base of the neck | Creates a delicate, polished focal point and frames the neckline |
| Middle | 18–20 in (46–51 cm) | Around the upper to mid-chest, below the first necklace | Acts as the primary statement layer and adds balance |
| Farthest (Longest) | 24–28 in (61–71 cm) | Lower chest or upper torso | Creates a lengthening effect, adds depth, and anchors the layered look |
Why this spacing works: Each necklace hangs at a distinct zone. Your eye registers three separate pieces instead of a tangled blur. The shortest layer sits closest to your skin; the longest extends farthest down. This creates visual rhythm and prevents overlap.
If you want to add a fourth layer, insert a 22-inch necklace between the middle and longest pieces. Five necklaces is the practical maximum without looking cluttered spacing becomes too tight, and untangling becomes a nightly chore.
Step-by-Step: How to Layer Without Tangling
Step 1: Lay Out All Necklaces on a Flat Surface Before Wearing
Don’t attempt to layer while wearing or standing. Spread each chain on a clean towel or soft cloth. Visually confirm that each one is tangle-free and the clasp is centered and secure. If a clasp is loose, do not wear that necklace in a layer until it’s fixed (see the Clasp Safety section below).
Step 2: Put On the Longest Necklace First
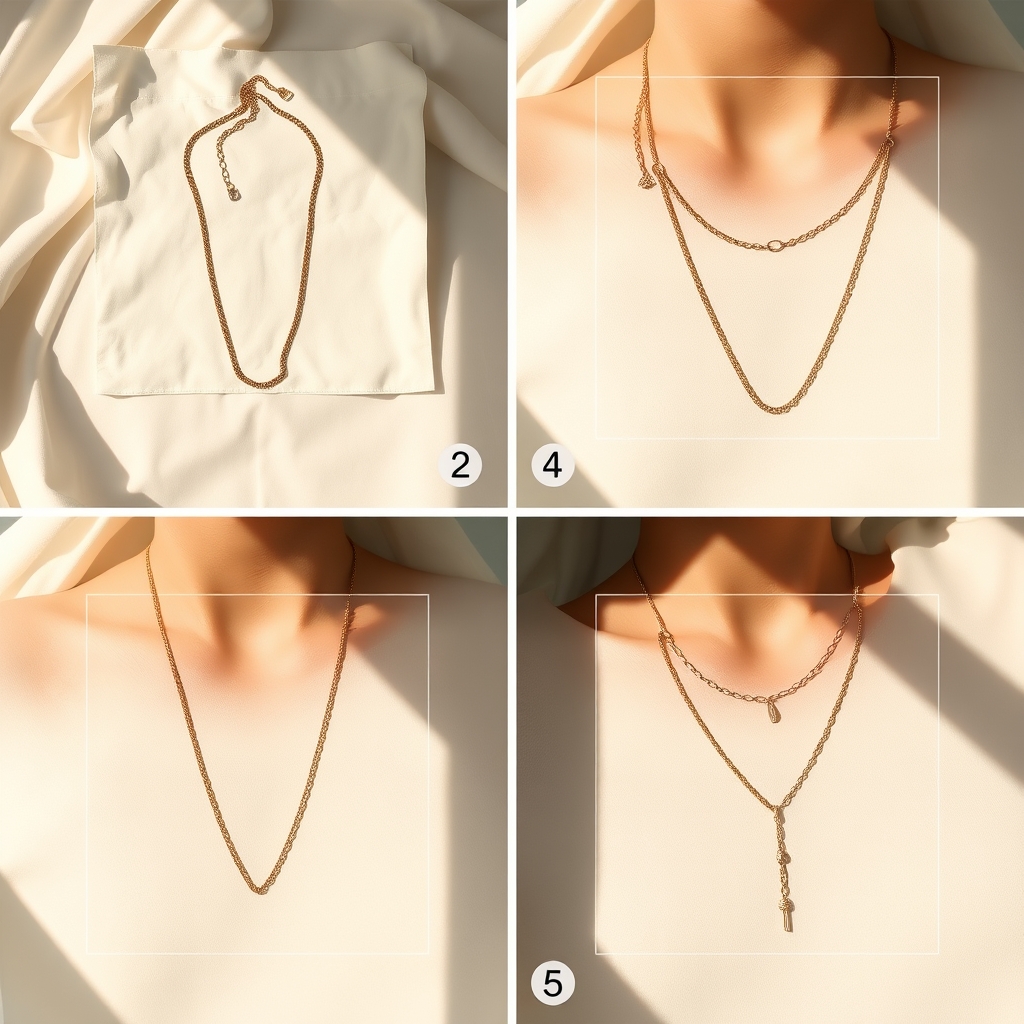
This seems counterintuitive, but it’s the secret to avoiding tangles. Slip the longest chain over your head first, then adjust it so it sits evenly against your chest. The longest piece is the most forgiving and least likely to tangle with later layers.
Step 3: Secure the Longest Necklace with a Magnetic Anchor (Optional but Recommended)
If you have a magnetic necklace anchor a small magnetic clasp that sits on the back of your neck attach the clasp of the longest necklace to it. This prevents the chain from sliding or shifting as you add more layers. Many jewelry organizer kits include these anchors. If you don’t have one, skip this step; layering still works, but you’ll need to adjust slightly more often.
Step 4: Add the Middle-Length Necklace Second
Once the longest is secure, slip the middle-length necklace over your head. As you lower it, gently guide it to sit in front of the longest chain. Ensure the clasp is centered at the back of your neck (not twisted to the side). Adjust until the middle layer sits visibly below the longest one typically 4–6 inches higher on your torso.
Step 5: Add the Shortest Necklace Last
Finally, slip on the shortest chain. This one sits closest to your skin and serves as the visual anchor high on your collarbone. Again, center the clasp and ensure it doesn’t twist. The shortest layer should feel snug but not tight you should fit one finger between the chain and your neck.
Step 6: Final Adjustment and Check
Look in a mirror and confirm three distinct layers. If any necklace overlaps with another or the layers feel bunched, gently hold the clasp area and slide each chain up or down until spacing is even. Layering takes 30 to 45 seconds once you’ve done it two or three times.
Clasp Safety: The Step Nobody Explains
Delicate necklaces are only safe to layer if their clasps are secure. A loose clasp will slip open mid-day, leaving you with a broken chain on the floor and a panicked search.
How to check a clasp before layering:
- Hold the necklace gently at both ends and give it a light tug not hard, just enough to test resistance. A secure clasp should not budge.
- If the clasp gives even slightly, do not wear that necklace in a layer. Secure it first using one of these methods:
- Gentle jewelry adhesive: Apply a tiny drop of hypoallergenic jewelry epoxy to the clasp hinge and let it cure for 24 hours. This is permanent, so use it only on necklaces you never plan to remove.
- Clear nail polish: For a reversible fix, paint a thin coat of clear nail polish on the clasp hinge and let it dry. This adds friction without permanently bonding it. You can remove it with acetone if needed.
- Professional tightening: If the clasp is loose because the metal is worn, have a jeweler resize or replace it. This typically costs $15–$35 and is worth the investment for pieces you wear often.
Based on owner reports we’ve reviewed, loose clasps are the single most common reason people abandon layering they lose faith after a chain falls once. Test before you commit.
Material Mixing: What Works and What Doesn’t
Not all metals and materials look good together. Here’s the framework:
Same Metal, Different Finishes (✓ Safe)
Yellow gold with rose gold, or silver with rose gold, typically creates a cohesive, intentional look especially if you introduce texture (a matte chain next to a polished one). This pairing reads as curated and modern.
Mixed Metals The Two-Metal Rule (✓ Mostly Safe)
Yellow gold + silver together can work if the piece ratios are balanced (e.g., one short gold necklace with a longer silver chain). The visual contrast reads deliberate rather than accidental. Avoid three metals (gold + silver + rose gold) unless you’re experienced that combination often reads as overwrought.
Varying Chain Thickness (✓ Best Practice)
Pair a delicate, thin chain with a slightly thicker (but still delicate) chain one or two layers down. This creates visual hierarchy and ensures each piece is distinct. A uniform thickness across all three layers can read as repetitive.
Gemstone or Pendant Additions (⚠ Use Caution)
Adding a pendant to one layer (not all three) is fine but place the pendant on your longest or middle layer, not your shortest. The shortest layer should remain minimal and airy. If you add pendants to multiple layers, the look quickly tips into busy or overwrought.
Materials to Avoid Mixing
- Cheap plating + fine metals: Gold-plated costume chains mixed with solid gold often show plating wear within months, and the visual mismatch becomes obvious as the cheaper pieces tarnish.
- Oxidized/blackened silver + bright silver: These can coexist, but ensure the darker piece is not the shortest layer dark metal high on the neck can read as harsh. Reserve oxidized chains for the middle or longest positions.
The Mistake Everyone Makes
Most people layer by grabbing three necklaces they like and putting them on in any order. Then they’re confused when the chains tangle or overlap. The common error is not measuring length beforehand and not using consistent spacing.
The second mistake is buying delicate necklaces with weak clasps and expecting them to survive layering. A delicate chain is useless if the clasp opens in your handbag after an hour of wear. Clasp inspection is not optional it’s the foundation of successful layering.
Outfit Pairing Strategies
Layering works best with specific necklines and outfit styles.
Best Necklines for Layering
Crewneck and high neck: These are ideal. The necklines stay low enough that all three layers are visible without competing for visual space with the neckline itself.
Scoop neck: Works well. Ensure your shortest necklace sits above the scoop line so it frames your collarbone rather than getting lost inside the neckline.
V-neck: Excellent. The V-neck creates natural visual space for layered chains. Avoid very deep V-necks unless you want the longest necklace to extend far down in casual settings, that can tip toward formal or overdone.
Open or off-shoulder: Tricky. Layering can compete with exposed shoulders. If you’re wearing off-shoulder or very open necklines, keep layers minimal (two pieces instead of three) and reserve layering for closed necklines.
Best Outfit Contexts
Casual day look: Layer two delicate necklaces in similar metals (e.g., two silver chains at different lengths) with a simple tee or sweater. This reads as intentional without trying too hard.
Office or polished casual: Three-layer look with varying metals (yellow gold + rose gold, or silver with a gold accent) pairs beautifully with neutral solid-color blouses, blazers, or high necklines. The layers add visual interest without distraction.
Evening or date night: One delicate chain with a single small pendant, layered with a slightly longer chain without pendant. Keep it minimal the goal is elegance, not bulk.
Patterned or busy tops: Use only one or two delicate necklaces. Layering three chains on a busy print overwhelms the look. Let the garment be the statement.
What to Avoid
Do not layer delicate necklaces with other statement jewelry. Multiple layers + chunky rings + chandelier earrings = costume. Choose one area for visual focus (layered necklaces OR bold earrings, not both).
Preventing Tangles: Storage and Daily Care
Once you’ve mastered layering, the next challenge is preventing tangles when you’re not wearing the necklaces.
Storage Solutions
Hanging organizer: A vertical necklace organizer with individual hooks keeps each chain separate and visible. Hang the longest necklace on the lowest hook, the shortest on the highest. This mirrors how you wear them and makes grabbing your set instant. Most organizers cost $15–$30 and are invaluable for anyone layering more than twice a week.
Individual zip-lock bags: If you don’t have an organizer, store each necklace in a separate small bag (e.g., 4×6 inch zip bags). This is cheap and effective but less convenient for daily wear.
Velvet or silk pouches: For fine jewelry, individual silk pouches protect delicate chains and slow tarnish. This is less about tangles and more about long-term material care, but it’s worth mentioning.
Daily Untangling
If necklaces tangle despite your best efforts:
- Lay the tangled mass on a flat, soft surface (microfiber cloth preferred).
- Use a magnifying glass and a very fine needle or tweezers to gently lift the knot.
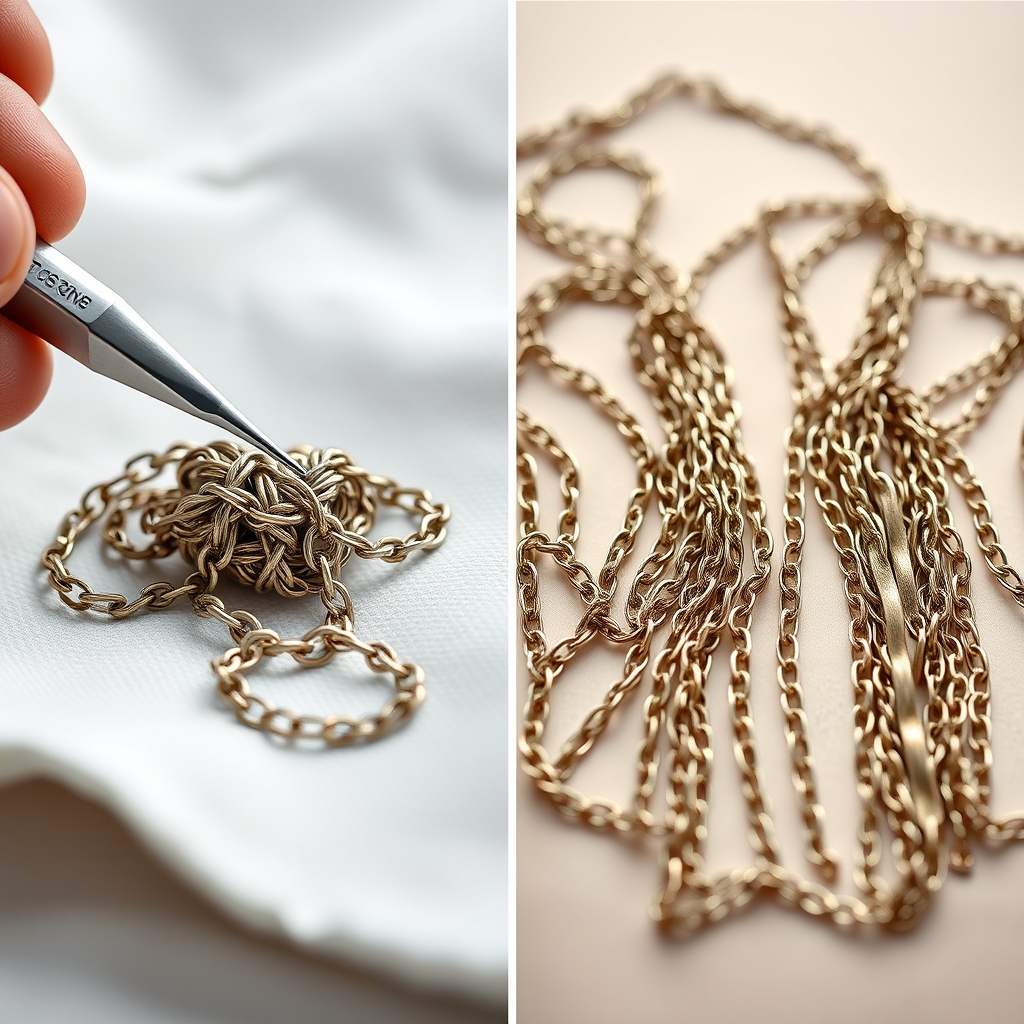
- Work from one side of the knot, gently coaxing the chain back through. Never yank.
- Once loosened, separate all three chains and lay them flat.
- Store immediately in your organizer or bags.
Based on owner feedback we’ve reviewed, the most effective untangling tool is patience rushing causes micro-tears in delicate chains. If a knot won’t yield after five minutes of gentle work, stop and consult a jeweler.
Material-Specific Care Tips
Delicate necklaces deserve specific care based on their material:
Sterling silver: Prone to tarnish, especially when layered (chains rub against skin and environment). Wipe with a soft, dry cloth after each wear. Store in individual bags or a tarnish-prevention organizer. Based on owner reports, sterling silver necklaces layered daily tend to show subtle tarnish within 2–4 weeks of regular wear this is normal and can be polished out.
Gold plating: More delicate than solid gold. Avoid contact with lotions, perfume, and sweat. Wipe immediately after wearing. Plating durability varies widely by quality in typical owner reports, gold-plated delicate chains show visible wear within 3–6 months of daily layering. If durability is a concern, invest in solid gold or gold-filled chains instead.
Gold-filled or solid gold: Most durable option. These require minimal care beyond occasional gentle wiping. Gold-filled chains (a thin layer of solid gold bonded to a base metal) tend to last many years of daily wear based on owner experience; solid gold lasts indefinitely with normal care.
Gemstone pendants or charms: If any of your layered necklaces include gemstones, avoid exposing them to extreme temperatures, direct sunlight (which can fade some stones), or harsh chemicals. Remove layered necklaces before swimming or bathing in chlorinated water.
FAQ: Your Layering Questions Answered
Can I layer more than three necklaces? Technically yes, but practically no. Four layers work if you space them perfectly (14, 18, 22, and 26 inches). Five or more becomes visually cluttered and prone to tangling. Most wearers find three to four layers is the sweet spot.
Will layering stretch or damage my delicate chains? No layering does not stress delicate chains in the way wearing a single heavy necklace does. The distributed weight across multiple thinner chains actually places less strain on any one chain. The real risk is tangling during storage or clasp failure, not damage from wearing layers.
What if my necklaces are different widths will that look weird? Not at all. Mixing widths (a thin chain with a slightly thicker chain) actually looks more intentional than matching widths. Variety signals that your layers are curated, not coincidental.
How do I keep layers from shifting during the day? Use magnetic necklace anchors to secure the clasps at the back of your neck. Alternatively, choose necklaces with slightly stiffer chains (gold-filled or solid metal chains hold position better than flimsy ones). Avoid synthetic or overly delicate chains if movement bothers you.
Is there a difference between costume jewelry and fine jewelry when layering? Only clasp reliability and tarnish speed. Costume chains are fine for layering if the clasps are secure. Fine jewelry (solid or gold-filled) resists tarnish better and tends to have sturdier clasps. Choose based on your wear frequency if you layer daily, invest in better clasp quality, regardless of metal type.
Can I sleep in layered necklaces? Not recommended. Sleeping in any necklace (layered or single) risks tangling and clasp stress. Remove all layers before bed and store immediately. This adds seconds to your routine and extends chain lifespan significantly.
Final Tips for Polished Layering
Layering delicate necklaces is a skill that improves with repetition. Your first attempt may feel awkward; by the tenth time, it becomes automatic. Start with two necklaces and master that pairing before adding a third. Choose necklaces with secure clasps this alone solves 90% of layering frustrations. Invest in an organizer to keep your sets tangle-free, and you’ll actually reach for them. The payoff is a look that reads intentional, elegant, and distinctly you exactly the effect a thoughtful layered necklace creates.